
Tips for Hanging Christmas Lights

How-To Tips for Hanging Christmas Lights on a Variety of Surfaces
If you’re a fan of the National Lampoon Vacation series of movies, you probably remember Clark Griswold's Christmas light installation antics in Christmas Vacation. Old Clark made a number of buffoonish mistakes in that movie, all to great comedic effect. But in real-life terms, Clark's Christmas light installation techniques included lots of no-nos.
One of those many mistakes had to do with the method he was using to attach the gazillions of Christmas lights to his house. Remember? He attached every single light line with staples:
- Lights on the roof shingles? Thwack - stapled.
- Lights on the siding? Thwack - stapled.
- Lights around window frames and doorjambs? Thwack - stapled.
- Lights in trees and foliage? Thwack - stapled.
Apart from stapling right through his gloves a time or two, there were lots of problems with Clark's staple-everything-everywhere approach. Because in fact, for each common surface to which you might want to attach Christmas lights, there's a best-method way of doing it.
Purpose-Made Clips and Attachment Accessories
Did you know that there are dozens of clips and attachment aids designed specifically for the installation of Christmas lights? It's true - and in fact, there are far too many to cover in a single article.
But for most Christmas light installation projects, there are just a few primary types of surfaces and situations involved. Here are the clips and attachment aids that are used most frequently in the majority of installation projects:
-
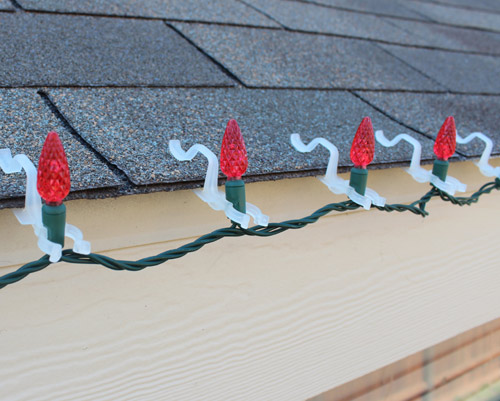
- Wood and Asphalt Shingles: There are a number of clips used for attaching lights to shingles, but the All In One Clip is the most commonly used and also doubles as a gutter clip. The Original Shingle Tab, as its name implies, was the first clip designed for use under shingles and still remains a popular choice today. Biaxial shingle tabs are also available (the tab that's slipped under a shingle and the bulb mounting face are aligned rather than opposed 90 degrees). Shingle tabs are designed to accommodate the two most popular sizes of Christmas light bulbs (C7 and C9).
-
- Clay Shingle Tiles: Lights can be attached to slate, flat, or barrel style roof tiles using a Clay Tile Roof Clip. Simple and quick install: the light clips to one end, and the other end clips to a roof tile. Ridges built into the clip help to hold it in place without applying enough pressure to damage the roofing tile.
-
- Roof Ridge Rows: Running strings of lights along roof ridge rows - either at the roof peak or at breaks in the plane of the roof - can create a very dramatic effect. You can attach lights to ridge rows using special-made clips. Ridge row clips are designed to work with all types of roof ridge rows and will accommodate both C7 and C9 sized bulbs.
-
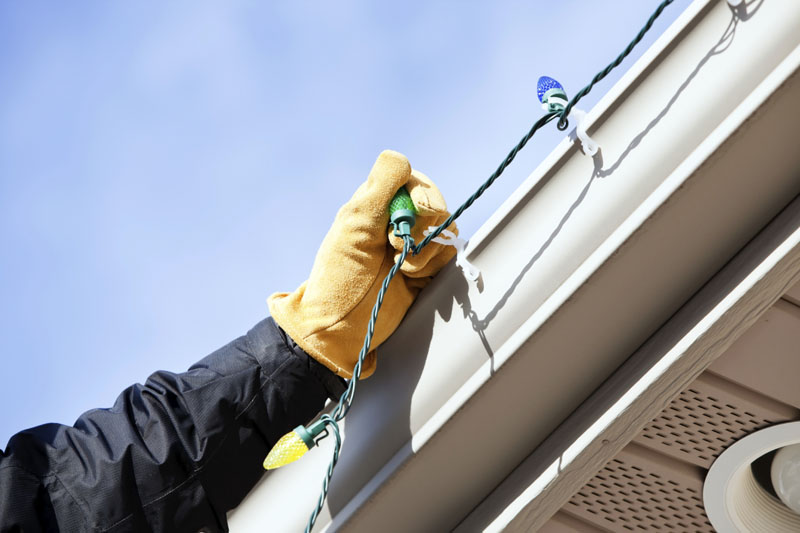
- Gutters: Gutter hooks are available for securing light lines to most types of guttering.
-
- Trees and Shrubbery: Tree clips can be used for installing lights on small tree branches, bushes, and shrubbery. Eliminates the need to wind light lines around branches or trunks. It is important to note that the shrub clips won't work on larger branches. This is actually one application where it's okay to use some staples, as long as you remove all of them after the holiday season. If the lights are going to be wrapped around the trunk for a long period of time, be sure and use stainless steel staples to prevent rusting, which can damage the tree.
-
- Flat, Smooth Surfaces (such as siding): There are several options for attaching lights to surfaces where there really isn't anything to 'grab onto,' including:
- C clips can be installed with adhesive or hardware (such as screws) and left in place for several seasons. C clips only work with C7 and C9 bulbs. Mini lights will not work with this application.
- Mini light adhesive clips (for mini lights only).
- Magnetic clips can be used for smooth magnetic surfaces containing a ferrous component. Clips allow both vertical and horizontal orientation of the bulbs.
- Flat, Smooth Surfaces (such as siding): There are several options for attaching lights to surfaces where there really isn't anything to 'grab onto,' including:
Don't Forget Hot Glue…
A very quick and easy way to install Christmas lights on a number of different surfaces is by using a hot glue gun. Glue works great for rough surfaces such as concrete, brick, and stucco. (Careful with stucco, though; some types of stucco may be damaged by the hot glue. Test a small area first.)
Hot glue is less likely to be effective on smooth metal surfaces. And the glue might damage plastic and painted surfaces, so it's probably best to stay with using an appropriate clip for those situations.
Quality Matters!
Hanging Christmas lights with cheap clips will only lead to Clark Griswold like disasters. Stay away from the big box retail store light hanging clips and instead find a reputable online seller that supplies clips and hardware to professional Christmas installers. Surprisingly, these better quality clips are not any more expensive than what you find at the big mega retail stores. You want your Christmas lighting masterpiece to look like it was professionally installed, right? Then stick to the same clips the pros use.
Let's Face It: Clark Really Didn't Know What He Was Doing
But the movie really wouldn't have been nearly as funny if Clark had been an expert at installing Christmas lights!
Your goal, of course, isn't to be funny when you install your Christmas lights. Your goal is to be safe, effective, and fast. And using the proper light hanging clips and attachment accessories will help you to effortlessly achieve that goal.
- Articles
- Ask Jason
- Christmas Lights
- Christmas Lights and Décor
- Christmas Time
- Christmas Traditions
- Christmas Trees
- Commercial Christmas Decorations
- Commercial Decorations
- Company News
- Decorative Lighting
- DIY Projects
- Light Installation
- Lighting Electrical
- Professional Christmas Installers
- RGB Christmas Lights
- Twinkly Smart Lighting


