How to Wrap a Tree in Lights

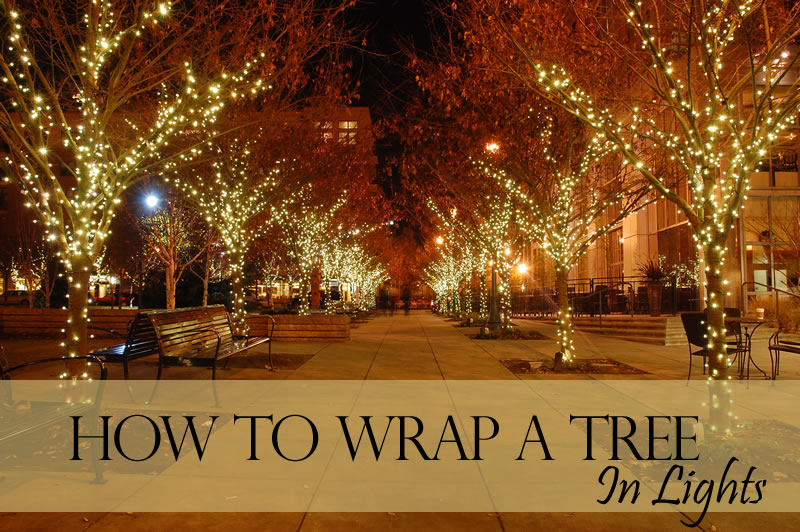 Wrapping outdoor trees in lights can elevate your outdoor party, wedding, or Christmas display from great to spectacular. It's a wonderful way to make sightseeing Christmas Enthusiasts say "ooh" and "ahh" as they slowly pass by your home.
But for all the 'oomph' that wrapping trees will add to your display, it's not a difficult task. Just follow a few basic tips and recommendations, and you'll find that the job of wrapping your trees will progress smoothly and quickly
Wrapping outdoor trees in lights can elevate your outdoor party, wedding, or Christmas display from great to spectacular. It's a wonderful way to make sightseeing Christmas Enthusiasts say "ooh" and "ahh" as they slowly pass by your home.
But for all the 'oomph' that wrapping trees will add to your display, it's not a difficult task. Just follow a few basic tips and recommendations, and you'll find that the job of wrapping your trees will progress smoothly and quickly
Choose Your Lights
The first step, of course, is to choose the lights you'll be using. There are no hard and fast rules for selecting lights for this purpose. Trees can be wrapped in just about any kind of decorative light.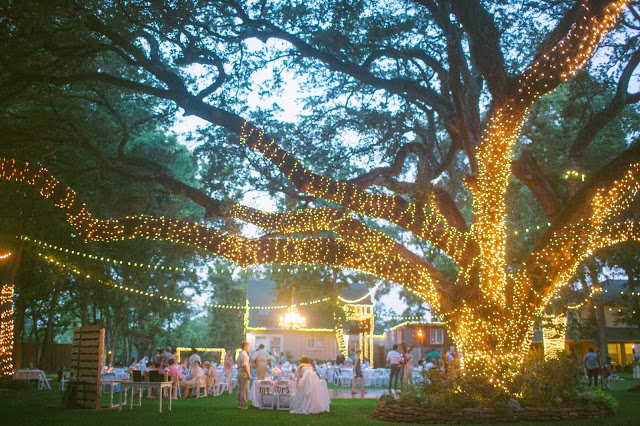
Photo Courtesy of KaitlinLeigh.com
Generally, though, smaller bulbs are considered more suitable for this purpose. Smaller bulbs tend to highlight and accent the natural symmetry of the tree without overwhelming. And it's also worth considering that smaller bulbs are much easier to install. The process of wrapping lines of lights around trunks and branches can be made significantly more difficult if you have to deal with the bulkiness of larger bulbs. Perhaps the most popular choice is to use mini-lights - preferably LED mini-lights. 5 mm Wide Angle Conical, specifically, is a great choice for wrapping trees. And it's the bulb of choice for the vast majority of professional lighting installers. Also, give some thought to the wire color of the light sets you purchase. Many of our bulbs are offered with the option of different wire colors such as white, green, and brown. You'll probably want to choose a wire color that will help the lights to blend with the natural look of the tree during daylight.Measure
You'll want to do some simple measuring and calculating to be sure that you have the lights on hand that you'll need. It's awfully frustrating to run out of lights on a partially completed tree!
Photo Courtesy of BrightBoldBeautiful.com
Start by measuring the distance around the trunk, the circumference. Now measure the height of the trunk. Also, decide how far apart you want to space each wrap of lights around the trunk (2-3 inches apart is a popular spacing). For illustrative purposes, let's say that the trunk is 5 feet in length, with a 3-foot circumference. And we're going to use 3-inch spacing between wraps. Now, let's put all those numbers together:- 5 feet (the length) x 4 (the number of wraps per foot) = 20 feet
- 20 feet x 3 feet (the circumference) = 60 feet
Wrap
Now we're ready to begin wrapping. Start by rolling your string of lights gently into a ball. Begin rolling the ball with the female plug end, so that the male plug will be on the outside of the ball. Wrapping the light string into a ball makes it much easier to handle throughout the process. You can hold the ball in one hand while guiding the wrapping with your other hand. It can also be helpful to measure out the spacing you want to use. If you're going to be using 3-inch spacing between wraps, for example, use a tape measure and a piece of chalk or a marker to place some small reference points along the length to be wrapped. Now start at the base of the trunk, with the male plug at ground level, and begin wrapping. Use your reference marks to maintain symmetry in spacing. Wrap fairly tightly, making each wrap a snug fit. Use the same process to wrap branches. Once you've wrapped a few times around, friction will help to hold the wire in place. But if you want really clean, even spacing that stays in place all season, we love using TreEZ wraps to help the process along. The strips come in various colors to help conceal them against the application surface, and clip together to make a strip as long as you need. Place them against the back of the tree and start wrapping your lights. For a more permanent solution, the strips have holes so you can nail them to the application surface.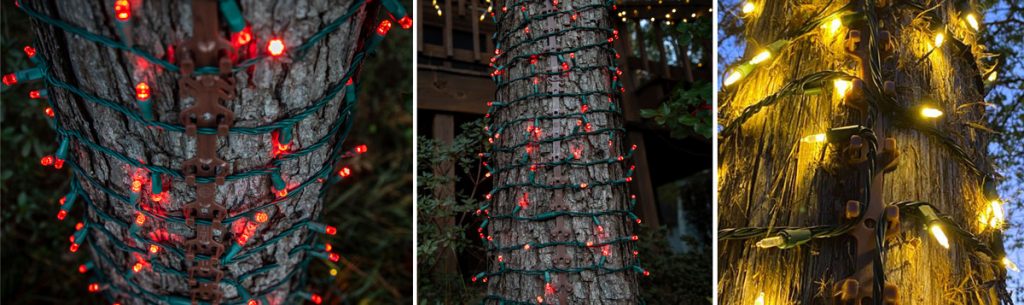 You can also use zip ties and these handy tree clips to help hold the wires in place. The clips can be particularly useful for holding the wires in position long-term since the swaying and bending caused by wind can work to dislodge wraps from their original positioning.
For an alternative criss-cross look, try wrapping both up and down the trunk or branch. On the first pass as you work your way up the trunk or branch, use double your desired spacing, placing a wrap at every other mark. Then when you reach the top, start back down, placing wraps at the marks that were skipped on the first pass.
You can also use zip ties and these handy tree clips to help hold the wires in place. The clips can be particularly useful for holding the wires in position long-term since the swaying and bending caused by wind can work to dislodge wraps from their original positioning.
For an alternative criss-cross look, try wrapping both up and down the trunk or branch. On the first pass as you work your way up the trunk or branch, use double your desired spacing, placing a wrap at every other mark. Then when you reach the top, start back down, placing wraps at the marks that were skipped on the first pass.
Enjoy!
Wrapping some of your trees with lights can make a dramatic impact upon your summer patio or Christmas display. Your family will enjoy the spectacular look, and so will sightseers. And we predict that you will even enjoy the process of installing lights on your trees. The process is just a little bit challenging and lots of fun!Search
Categories
- Articles
- Ask Jason
- Christmas Lights
- Christmas Lights and Décor
- Christmas Time
- Christmas Traditions
- Christmas Trees
- Commercial Christmas Decorations
- Commercial Decorations
- Company News
- Decorative Lighting
- DIY Projects
- Light Installation
- Lighting Electrical
- Professional Christmas Installers
- RGB Christmas Lights
- Twinkly Smart Lighting
Recent Posts
#1 Choice for Pros & Christmas Enthusiasts
Top Pages
- FAQ
- When Do Cities Take Down Christmas Lights?
- What Can You Do with Leftover Christmas Decorations?
- What Can You Do with Leftover Christmas Decorations?
- When Should You Take Christmas Decorations Down?
- Are Commercial-Grade Christmas Lights Worth It?
- What Does “Commercial-Grade Christmas Lights” Mean?
- What is the Difference Between Retail Christmas Lights and Commercial Lights?
- How to Store Icicle Lights
- How Do You Hang Icicle Lights?
- Do LED Christmas Lights Use a Lot of Electricity?
- Are LED Christmas Lights Better for the Environment?
- Are LED Christmas Lights Shatterproof?
- How Much Do LED Christmas Lights Cost to Run?
- What Kind of Christmas Lights are Best for Outside?
- How Many LED Christmas Lights Can I String Together?
- Are LED Christmas Lights Cheaper to Run Than Incandescent Lights?
- Are LED Christmas Lights Safer?
- Are LED Christmas Lights Brighter?
- Can LED Christmas Lights Get Wet?
- Why Are My Christmas Lights Dim?
- Why Do Christmas Lights Stop Working?
- Test FAQ
- Do LED Christmas Lights Get Hot?
- Are LED Christmas Lights Worth the Extra Money?
- How Long Do LED Christmas Lights Last?
- Commercial Christmas Decorating, Sales & Consulting
- Commercial Christmas Garland
- Indoor & Outdoor Commercial Christmas Trees
- Light Pole Banners